Hello,
I have a pocket nc v2-10 with the latest kinetic control (just upgraded last weekend (10/24/25)).
I saw Josh Pieper tutorial on his touch probe and got excited to add one. I noticed that he had to create a splitter (I haven’t gone through his whole project yet) and was wondering if there was a cleaner method. It seems like the staff was ok with this (I did see the warning about the limit switch effecting the calibration) so I wanted to ask if they could provide clarification on a way to access a pin for this probe input.
I have been learning about Linux cnc a little and see that it uses a parallel port (and a breakout board) from what I saw on my pocket nc that seems to be the hat the beagle board is connected to. Is there a way to pull out a connector from there and keep it close to the current inputs (Ethernet/usb) on the front? I was wondering if the electrical schematic is available too.
I am a noob at cnc and have some software and electrical experience so will prob get some of this wrong as I learn about it!
Thanks for your input here.
Guy
Oh one more thing, I read on another post that kinetic control has to support the probe inputs too. I think it was working a little (z axis?) but might run into issues with this later.
11/2/25 update
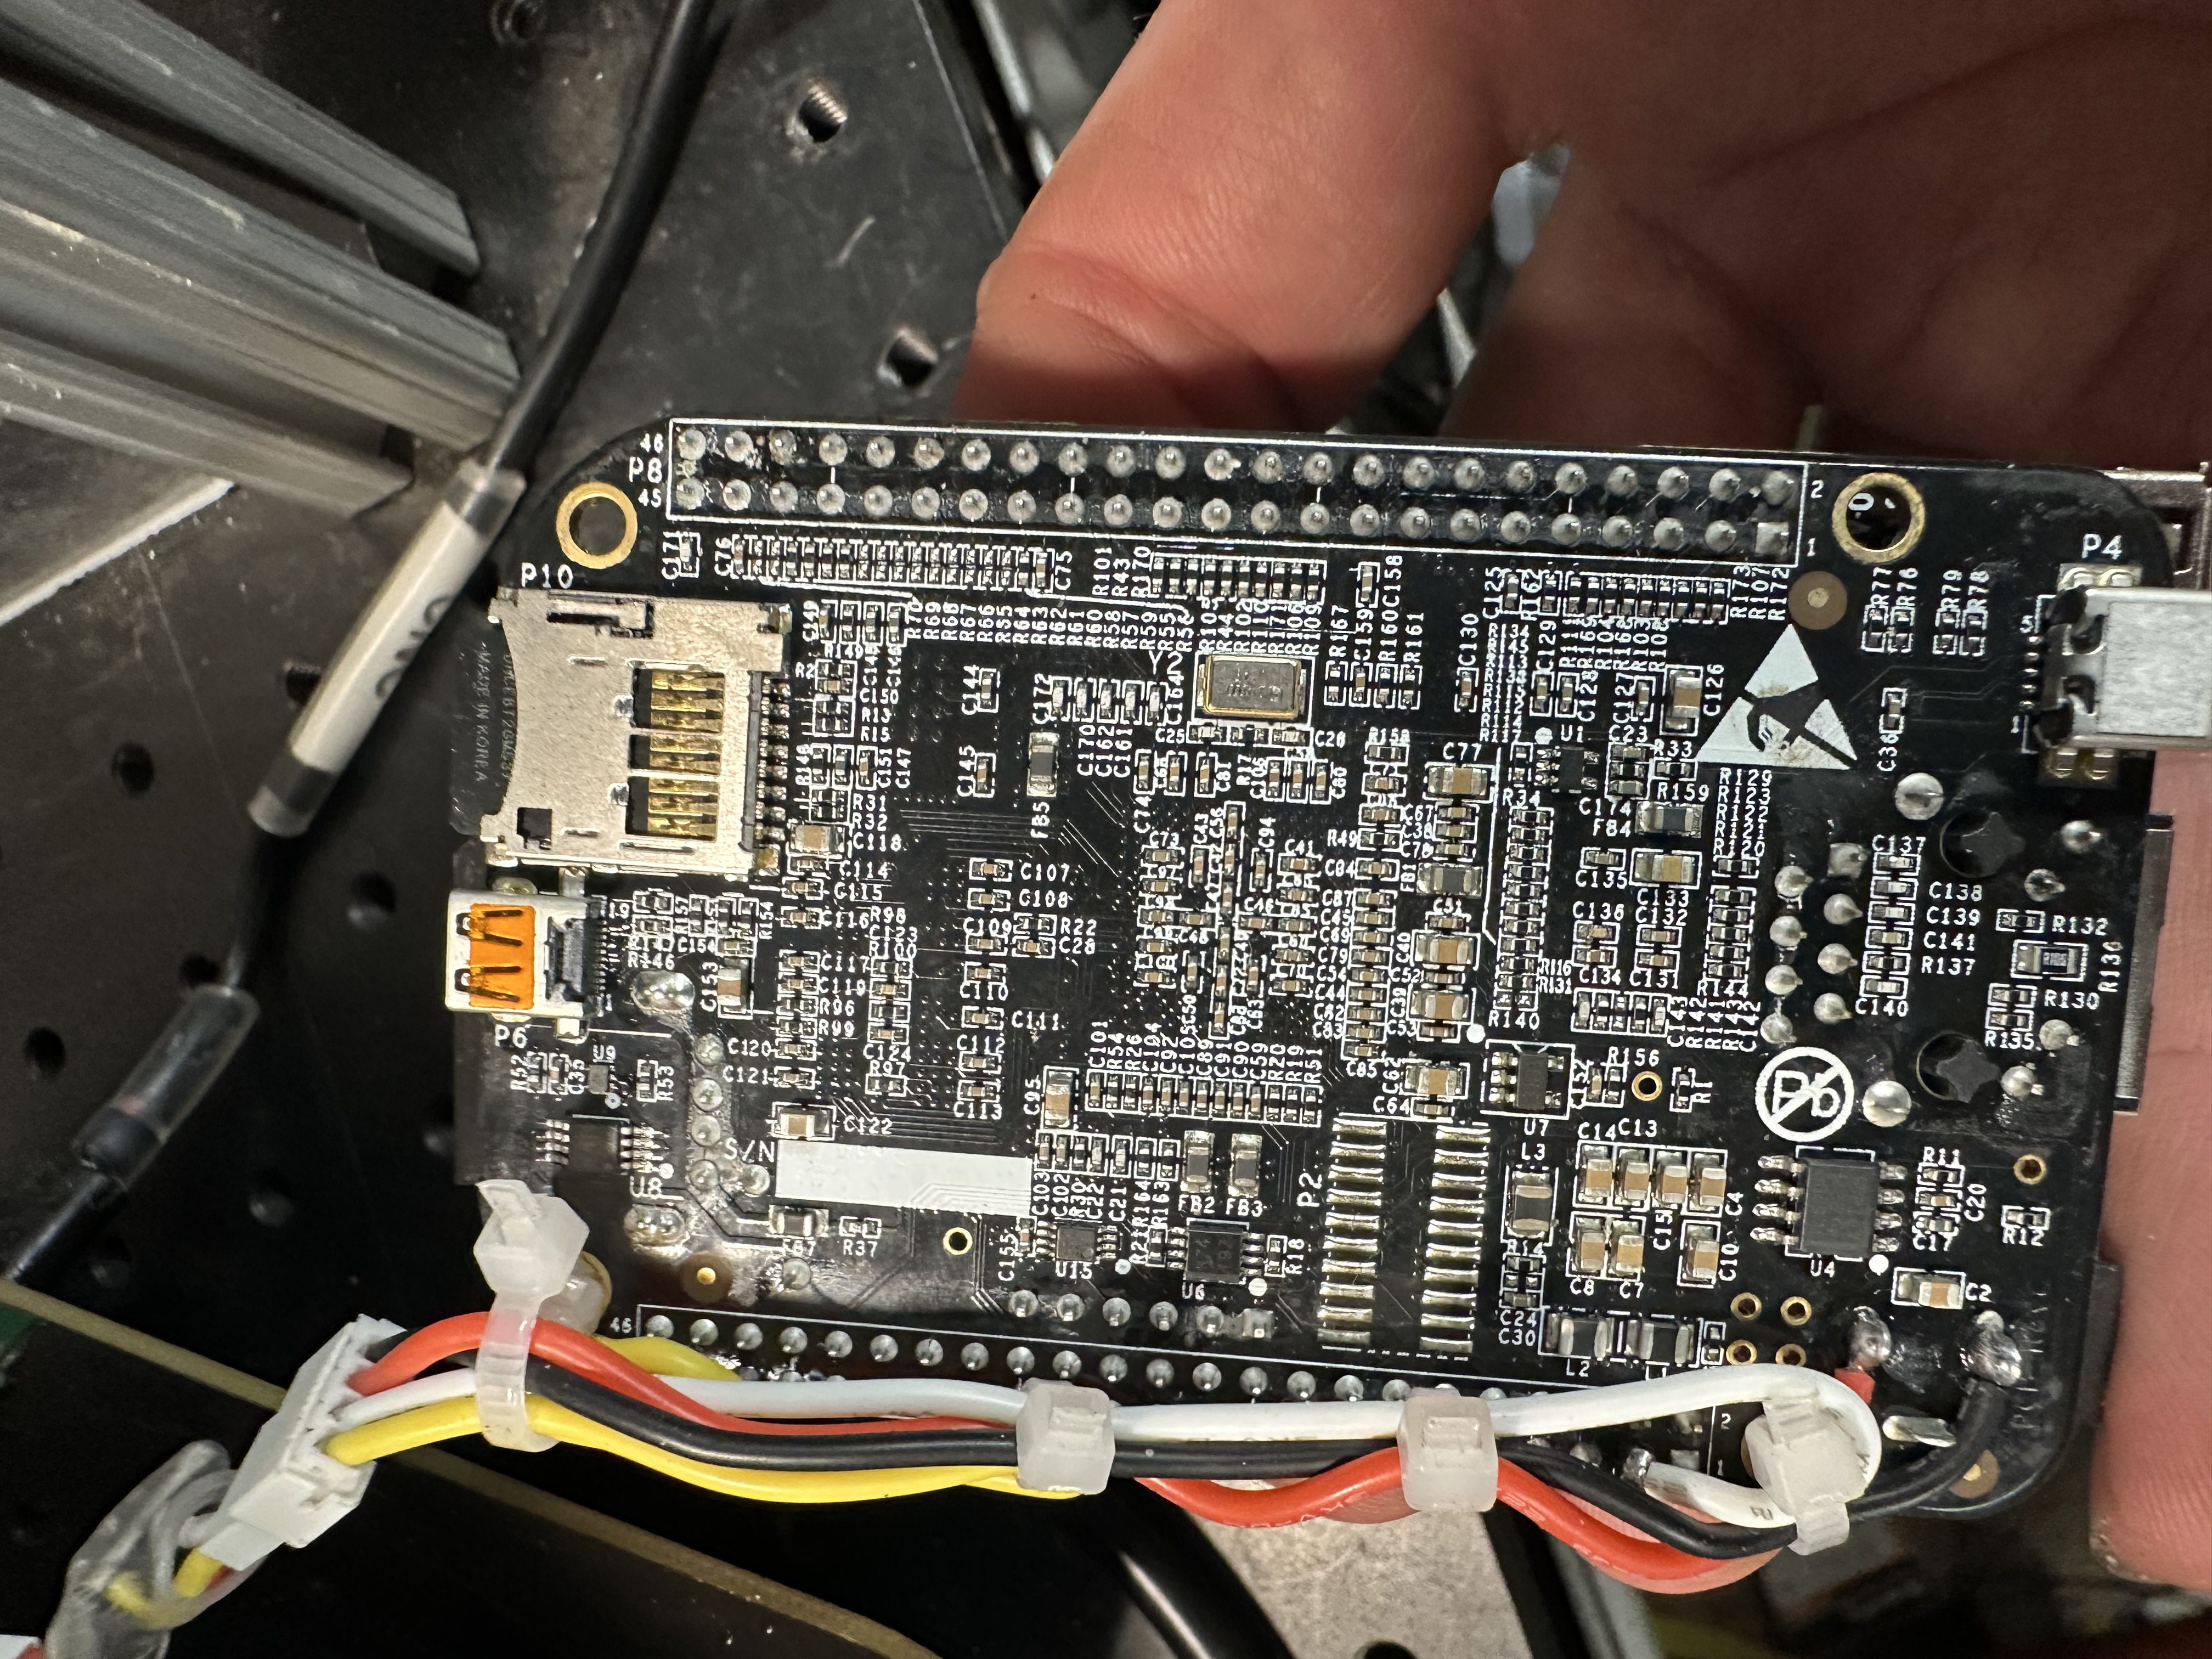
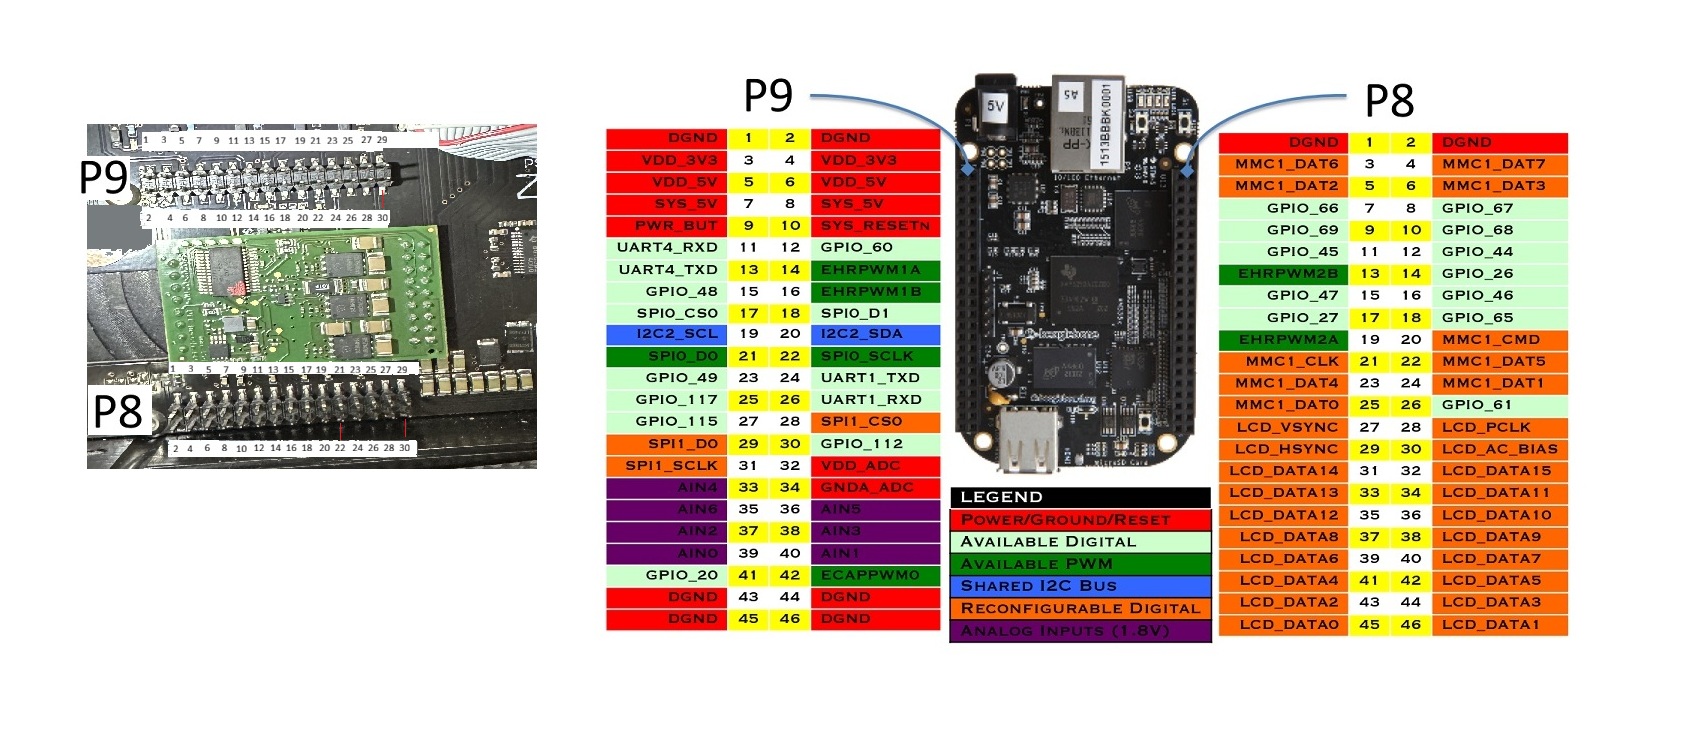
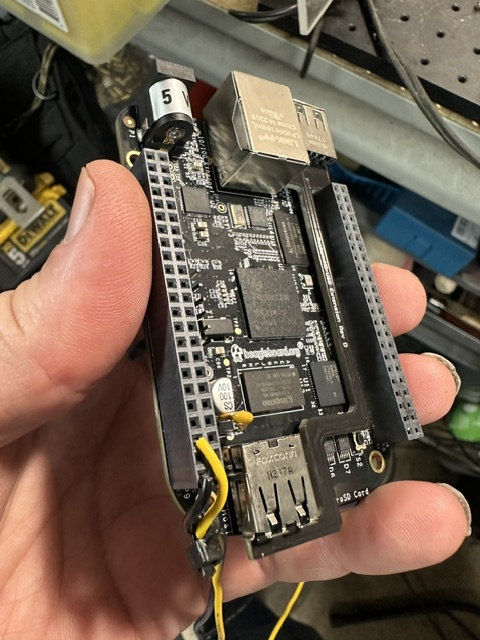
I took a pic of the BBB and daughter board. This showed me the free pins (assuming they are actually free!). P9 GPIO_20 (pin 41) looks free (would love some verification here ;)).
I bought a BBB and made an image of the sd card to run it with. I have the Kinetic control working but it looks like halcmd is failing since there is no hardware to talk to (again assuming since I don’t know this side of things :()
11/3/25 update
***Work in Progress Use at Own Risk***
Guide to Adding a Stock Probe to PocketNC on Pin P9_41
This guide provides a clear, step-by-step process to add a stock probe to your PocketNC on pin P9_41 (STOCK_PROBE_PIN=941), integrating it with LinuxCNC and ensuring proper signal inversion for an active-high probe. The process involves physically connecting the probe, configuring the INI and HAL files, and creating a G-code subroutine for probing. Tested as of November 3, 2025, 11:49 PM EST.
Prerequisites
- PocketNC running LinuxCNC with Pentamachine’s Kenetics interface.
- A stock probe (active-high,
TRUEwhen triggered) with a 5V to 3.3V level converter. - Administrative access to run
sudocommands (pocketnc user has this).
Step-by-Step Instructions
1. Physically Connect the Stock Probe
Connect the stock probe to the BeagleBone Black:
-
Hardware Setup:
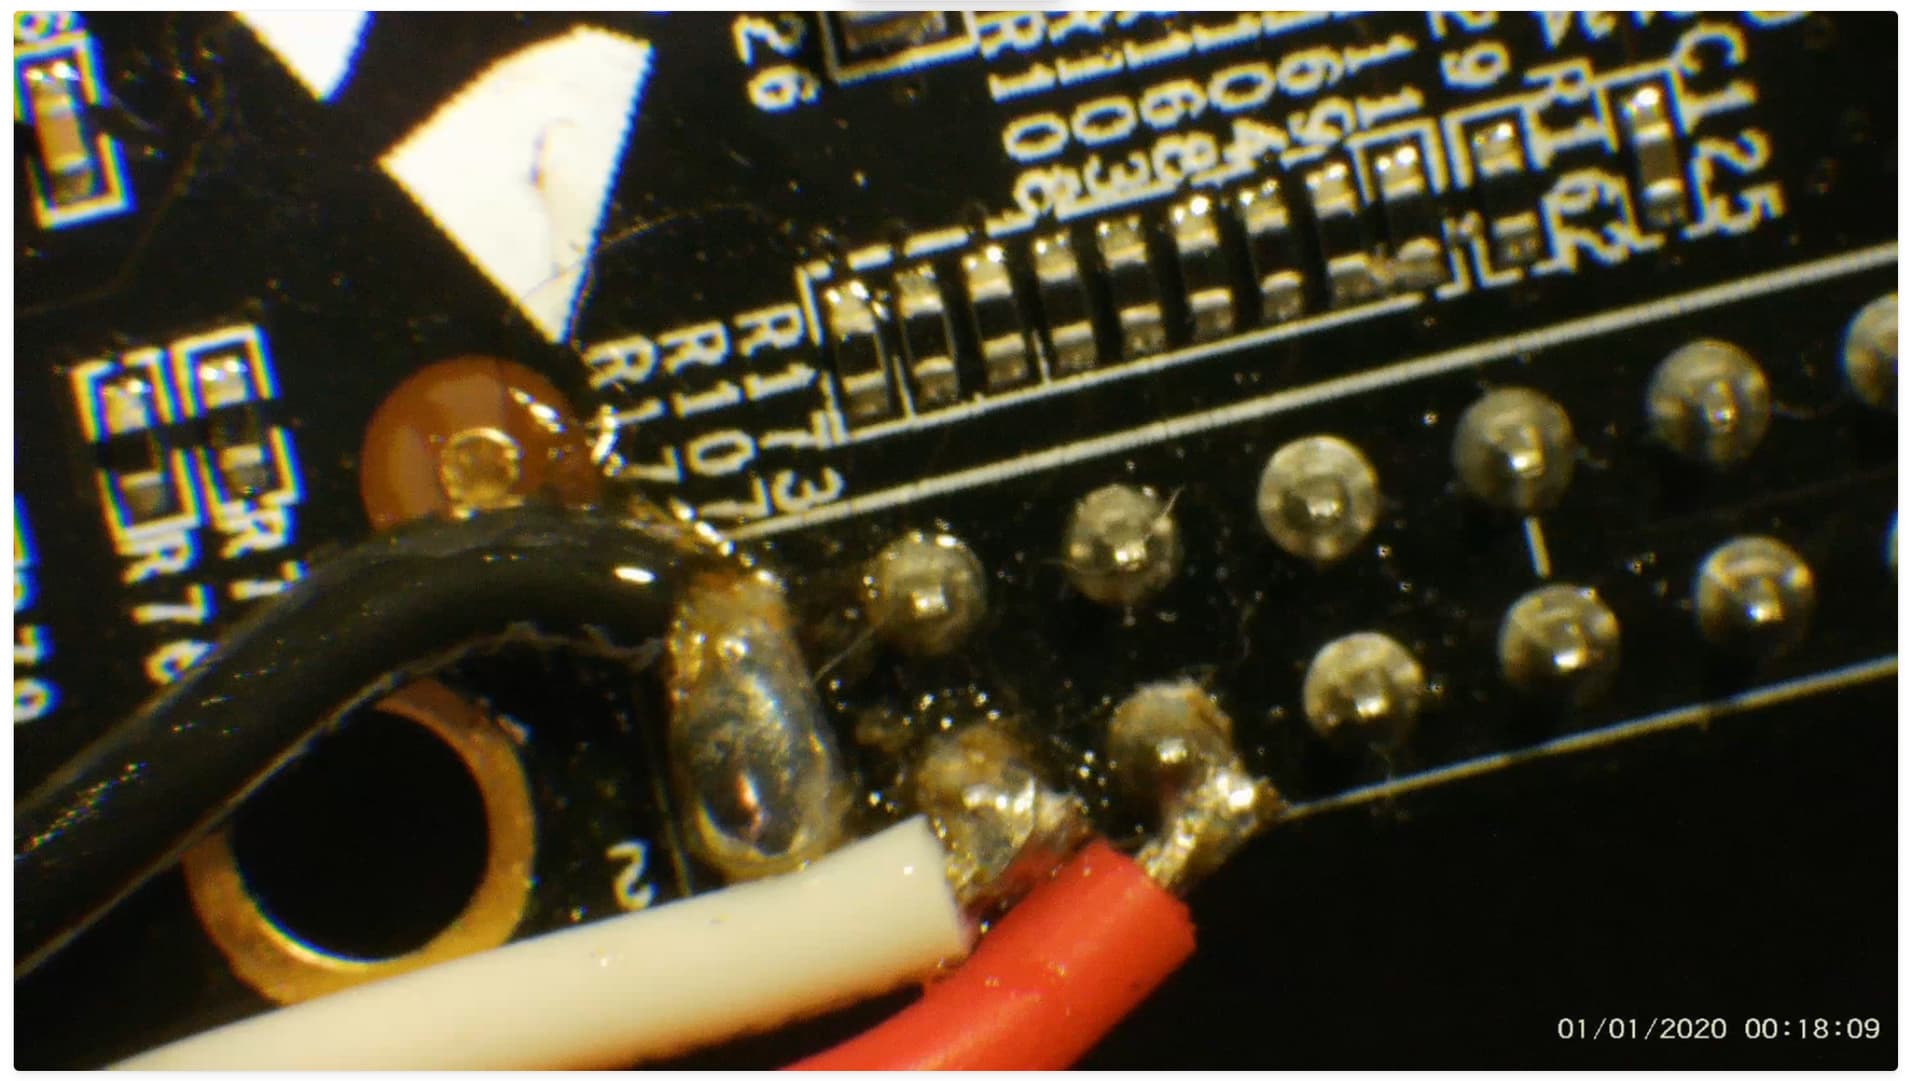
- Attach the probe’s signal line to GPIO_20 (pin 41, P9_41) on the BeagleBone Black.
- I did this by using breadboard wire
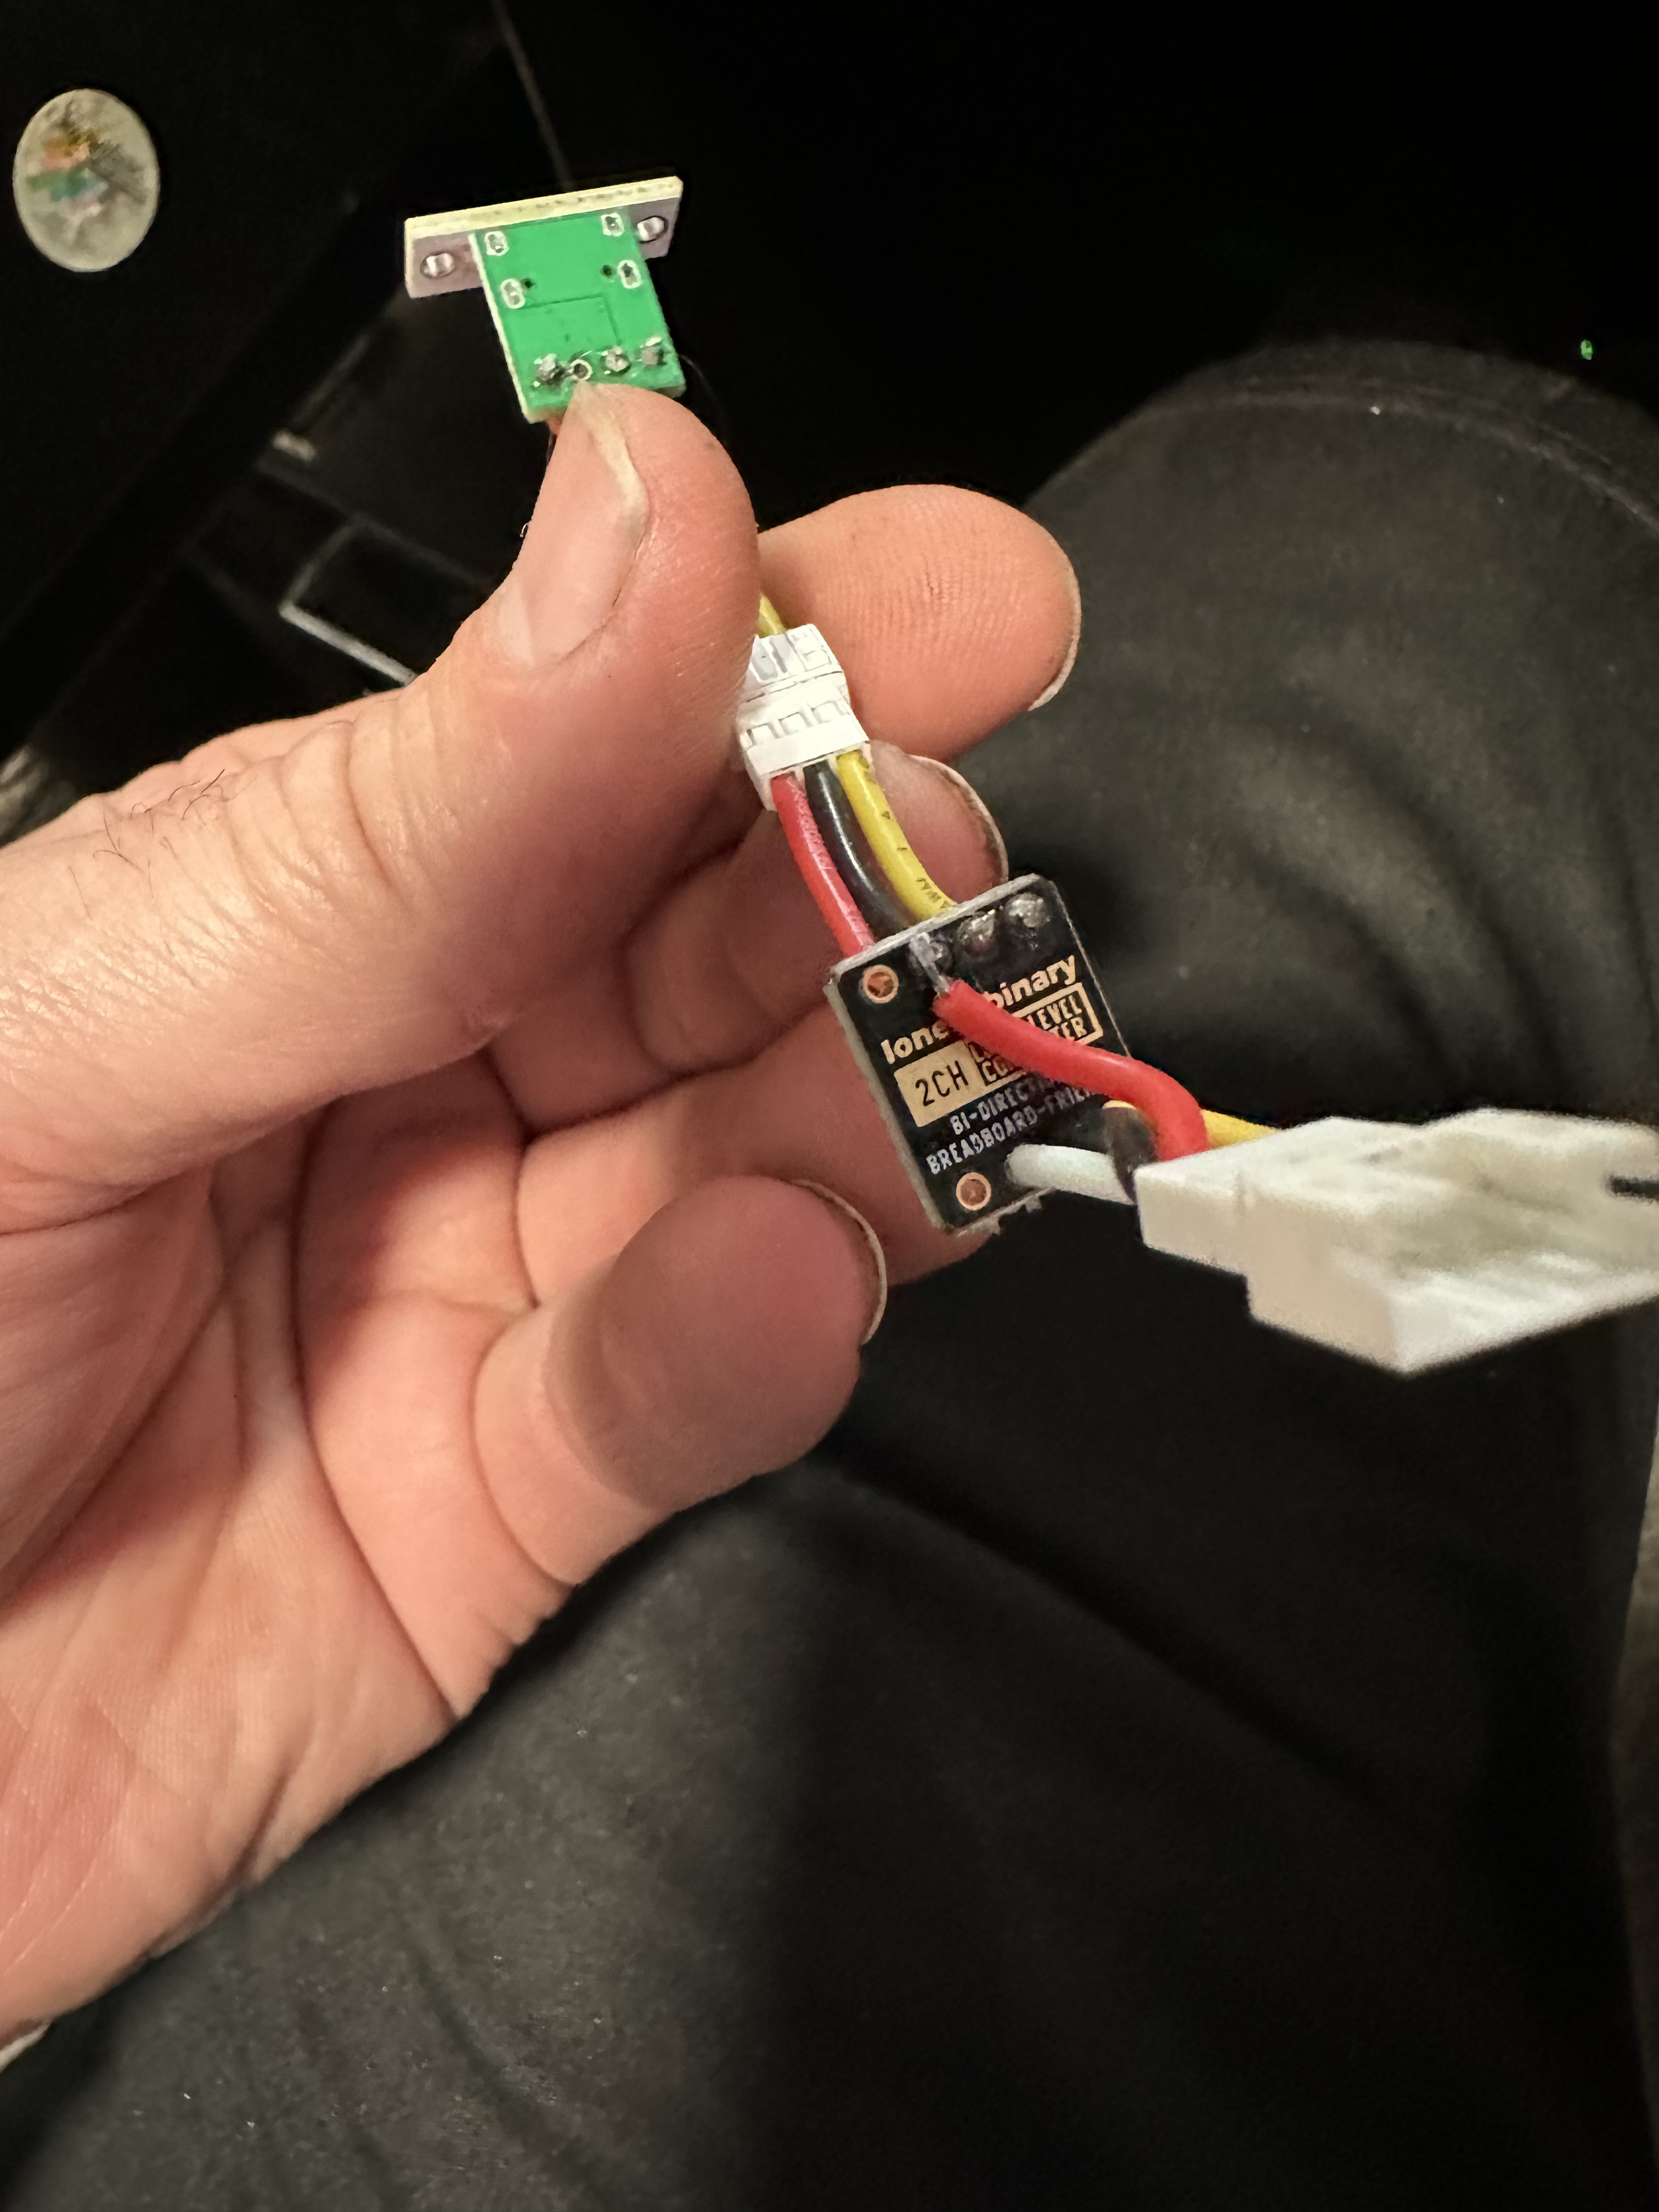
- Use a 5V to 3.3V level converter to ensure compatibility with the BeagleBone’s 3.3V logic.
- Connect the probe’s power and ground lines as per its specifications (typically 5V power, ground to BeagleBone GND).
- Attach the probe’s signal line to GPIO_20 (pin 41, P9_41) on the BeagleBone Black.
- Verification: Ensure the probe outputs a 3.3V signal (from level converter) when triggered (test with a multimeter if needed).
-
Images:
Pin 41 for probe signal and Pin 43/45 for ground
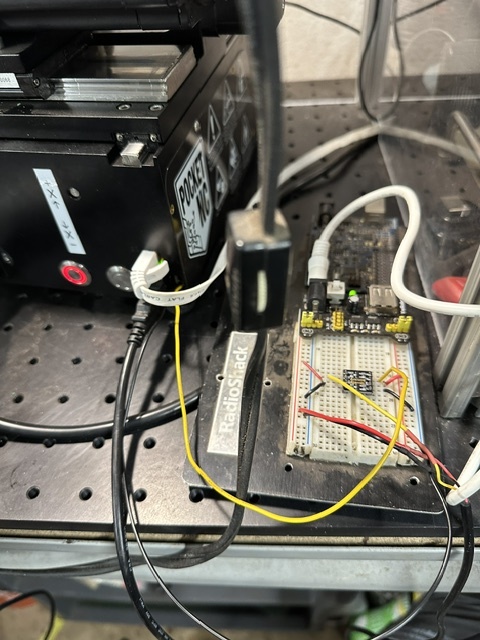
currently testing with a 5v/3.3v breadboard powersupply and a voltage converter to input 3.3v to beaglebone board (I assume everyone knows 5v will fry it!!!)
2. Overcome Read-Only Filesystem Access to update/generate files
The /usr filesystem (containing /opt/pocketnc/) may be read-only due to OSTree. Temporarily bind it to a writable location:
sudo mkdir -p /tmp/settings
sudo mount --bind /usr/opt/settings /tmp/settings
sudo mount -o remount,rw /tmp/settings
Once done with the file editing, clean up the mount (or reboot)
sudo umount /tmp/settings
- Note: This is a working solution to the filesystem configuration. I am not sure if there is better ways to do this (both mounting to gain access and unmounting/reboot afterwards). Please advise!
3. Add STOCK_PROBE_PIN to Base INI
Ensure the pin is defined in the configuration:
sudo nano /opt/pocketnc/Settings/versions/v2revR/PocketNC.ini
-
Modify: Add to
[POCKETNC_PINS]section (below the INTERLOCK_OPEN_PIN):
STOCK_PROBE_PIN=941
-
Save:
Ctrl+O,Enter,Ctrl+X. - Purpose: Defines pin 941 for the stock probe.
4. Create v2_stock_probe Feature Files
Set up the HAL file, HAL inclusion, and signal mapping:
sudo mkdir -p /opt/pocketnc/Settings/features/v2_stock_probe
sudo nano /opt/pocketnc/Settings/features/v2_stock_probe/v2_stock_probe.hal
-
Content for
v2_stock_probe.hal:# Stock Probe - ball is 0.0780"/1.98mm newinst bb_gpio stock-probe-pin pin=[POCKETNC_PINS]STOCK_PROBE_PIN direction=input setp stock-probe-pin.invert 1 unlinkp probe-inputs.in-2 net probe-input-0 probe-inputs.in-2 -
Save:
Ctrl+O,Enter,Ctrl+X.
sudo nano /opt/pocketnc/Settings/features/v2_stock_probe/append.inc
-
Content:
[HAL] HALFILE=/opt/pocketnc/Settings/features/v2_stock_probe/v2_stock_probe.hal -
Save:
Ctrl+O,Enter,Ctrl+X.
sudo nano /opt/pocketnc/Settings/features/v2_stock_probe/overlay.inc
-
Content:
[PENTA] STOCK_PROBE_SIG=probe-input-0 -
Save:
Ctrl+O,Enter,Ctrl+X.
sudo chown pocketnc:pocketnc /opt/pocketnc/Settings/features/v2_stock_probe/*
sudo chmod 644 /opt/pocketnc/Settings/features/v2_stock_probe/*
-
Purpose: Configures pin 941 as
stock-probe-pin, inverts the signal, and maps it toprobe-input-0.
5. Enable Feature in Base INI
sudo nano /opt/pocketnc/Settings/versions/v2revR/PocketNC.ini
-
Modify: Add to
[PENTA_FEATURES]section:V2_STOCK_PROBE=1 -
Save:
Ctrl+O,Enter,Ctrl+X. -
Purpose: Instructs
generateINI.pyto includev2_stock_probe.hal.
6. Restart services
Use the Kinetic Control UI - Config → Machine Config: Restart Services button
-
Purpose: Regenerates
/var/opt/pocketnc/PocketNC.iniand reloads LinuxCNC.
7. Verify Pin and Signal
halcmd show pin motion.probe-input
halcmd show sig | grep probe
Example sig output:
Probe NOT triggered
bit FALSE -- probe-input
                                 ==> motion.probe-input
                                 <== probe-inputs.out
bit FALSE -- probe-input-0
                                 ==> probe-inputs.in-2
                                 <== stock-probe-pin.in
With probe triggered
bit TRUE -- probe-input
                                 ==> motion.probe-input
                                 <== probe-inputs.out
bit TRUE -- probe-input-0
                                 ==> probe-inputs.in-2
                                 <== stock-probe-pin.in
-
Expected Output:
- Pin:
bit OUT FALSE stock-probe-pin.in(open) orTRUE(triggered). - Signal:
bit FALSE probe-input-0(open) orTRUE(triggered).
- Pin:
- Purpose: Confirms pin 941 is active and toggles correctly.
8. Create G-Code Subroutine - ***Need to polish this. May work or may not depending on current coordinates…
echo -e "O<stock_probe> sub\nG91\nG38.2 Z-3 F5\n#<probe_z> = #5063\nG90\nG0 Z[#<probe_z> + 2]\nM2\nO<stock_probe> endsub" > /home/pocketnc/stock_probe.ngc
- Purpose: Defines a subroutine to probe down, store the Z position, and retract.
9. Integrate Subroutine with Kenetics
To be tested and finalized. The G-code stock_probe.ngc must be added to Kenetics’ subroutine library:
-
Placeholder Steps:
- Copy
/home/pocketnc/stock_probe.ngcto the Kenetics subroutine directory (e.g.,/home/pocketnc/subroutines/or/usr/opt/settings/subroutines, confirm path). - Register the subroutine in Kenetics - subroutine can be called from web interface
o<stock_probe> call(this may be enough?) - Position the probe with enough room and have the probe in your hand to manually test.
- Copy
- Expected Behavior: Z-axis moves to the left, when probe triggers it stops, and retracts.
10. Verify G-Code File
ls -l /home/pocketnc/stock_probe.ngc
-
Expected Output:
-rw-r--r-- ... stock_probe.ngc. - Purpose: Confirms the G-code file exists.
Testing and Troubleshooting
-
Verify Files:
Expect:ls -l /opt/pocketnc/Settings/features/v2_stock_probe/-rw-r--r-- pocketnc pocketncfor all files. -
Check INI:
Expect:grep STOCK_PROBE_SIG /var/opt/pocketnc/PocketNC.iniSTOCK_PROBE_SIG=probe-input-0. -
Debug Signal:
Look for:halcmd show all | grep -E "stock-probe|probe-input-0"stock-probe-pin.in→stock-probe-raw→stock-probe-oneshot-or.out→probe-input-0.
This guide ensures a replicable process for adding a stock probe and manually testing. Probe routines and perhaps a script to automate the setup to come!
Update 11/6/25:
Pics and hopefully usable tutorial
Todo:
- Getting parts to house an external setup (pins unfortunately still need to be connected to board in some way).
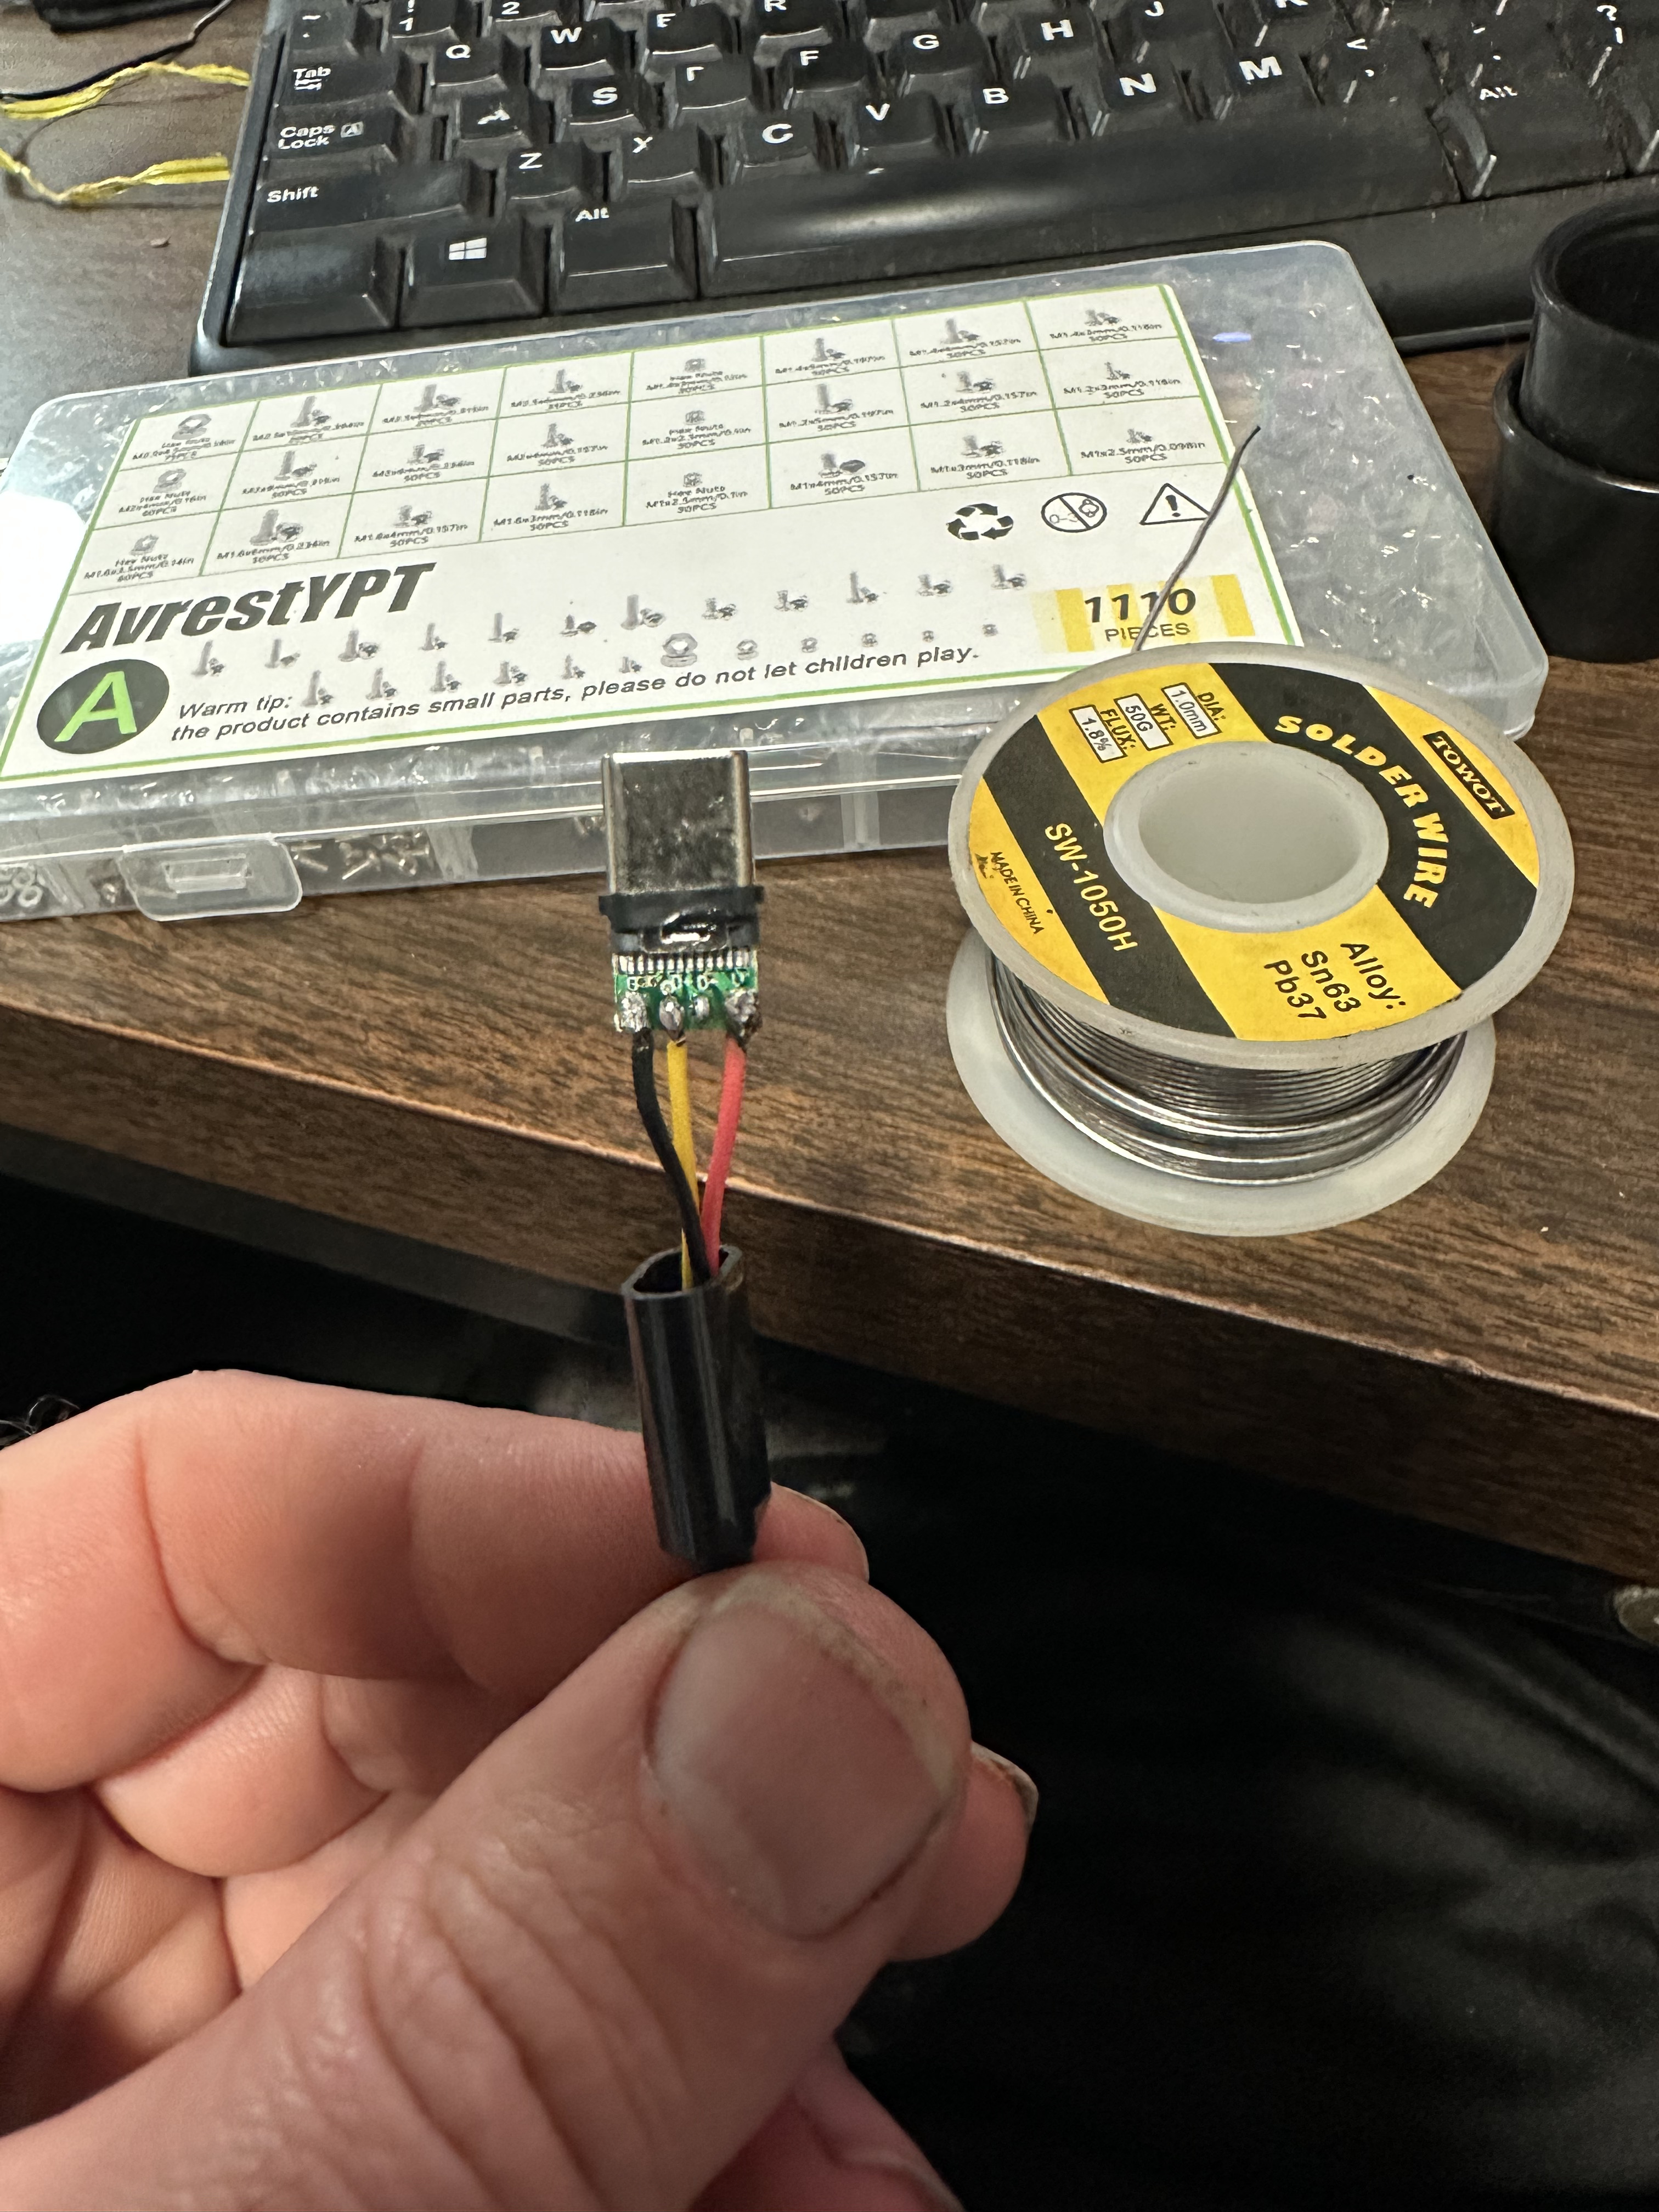
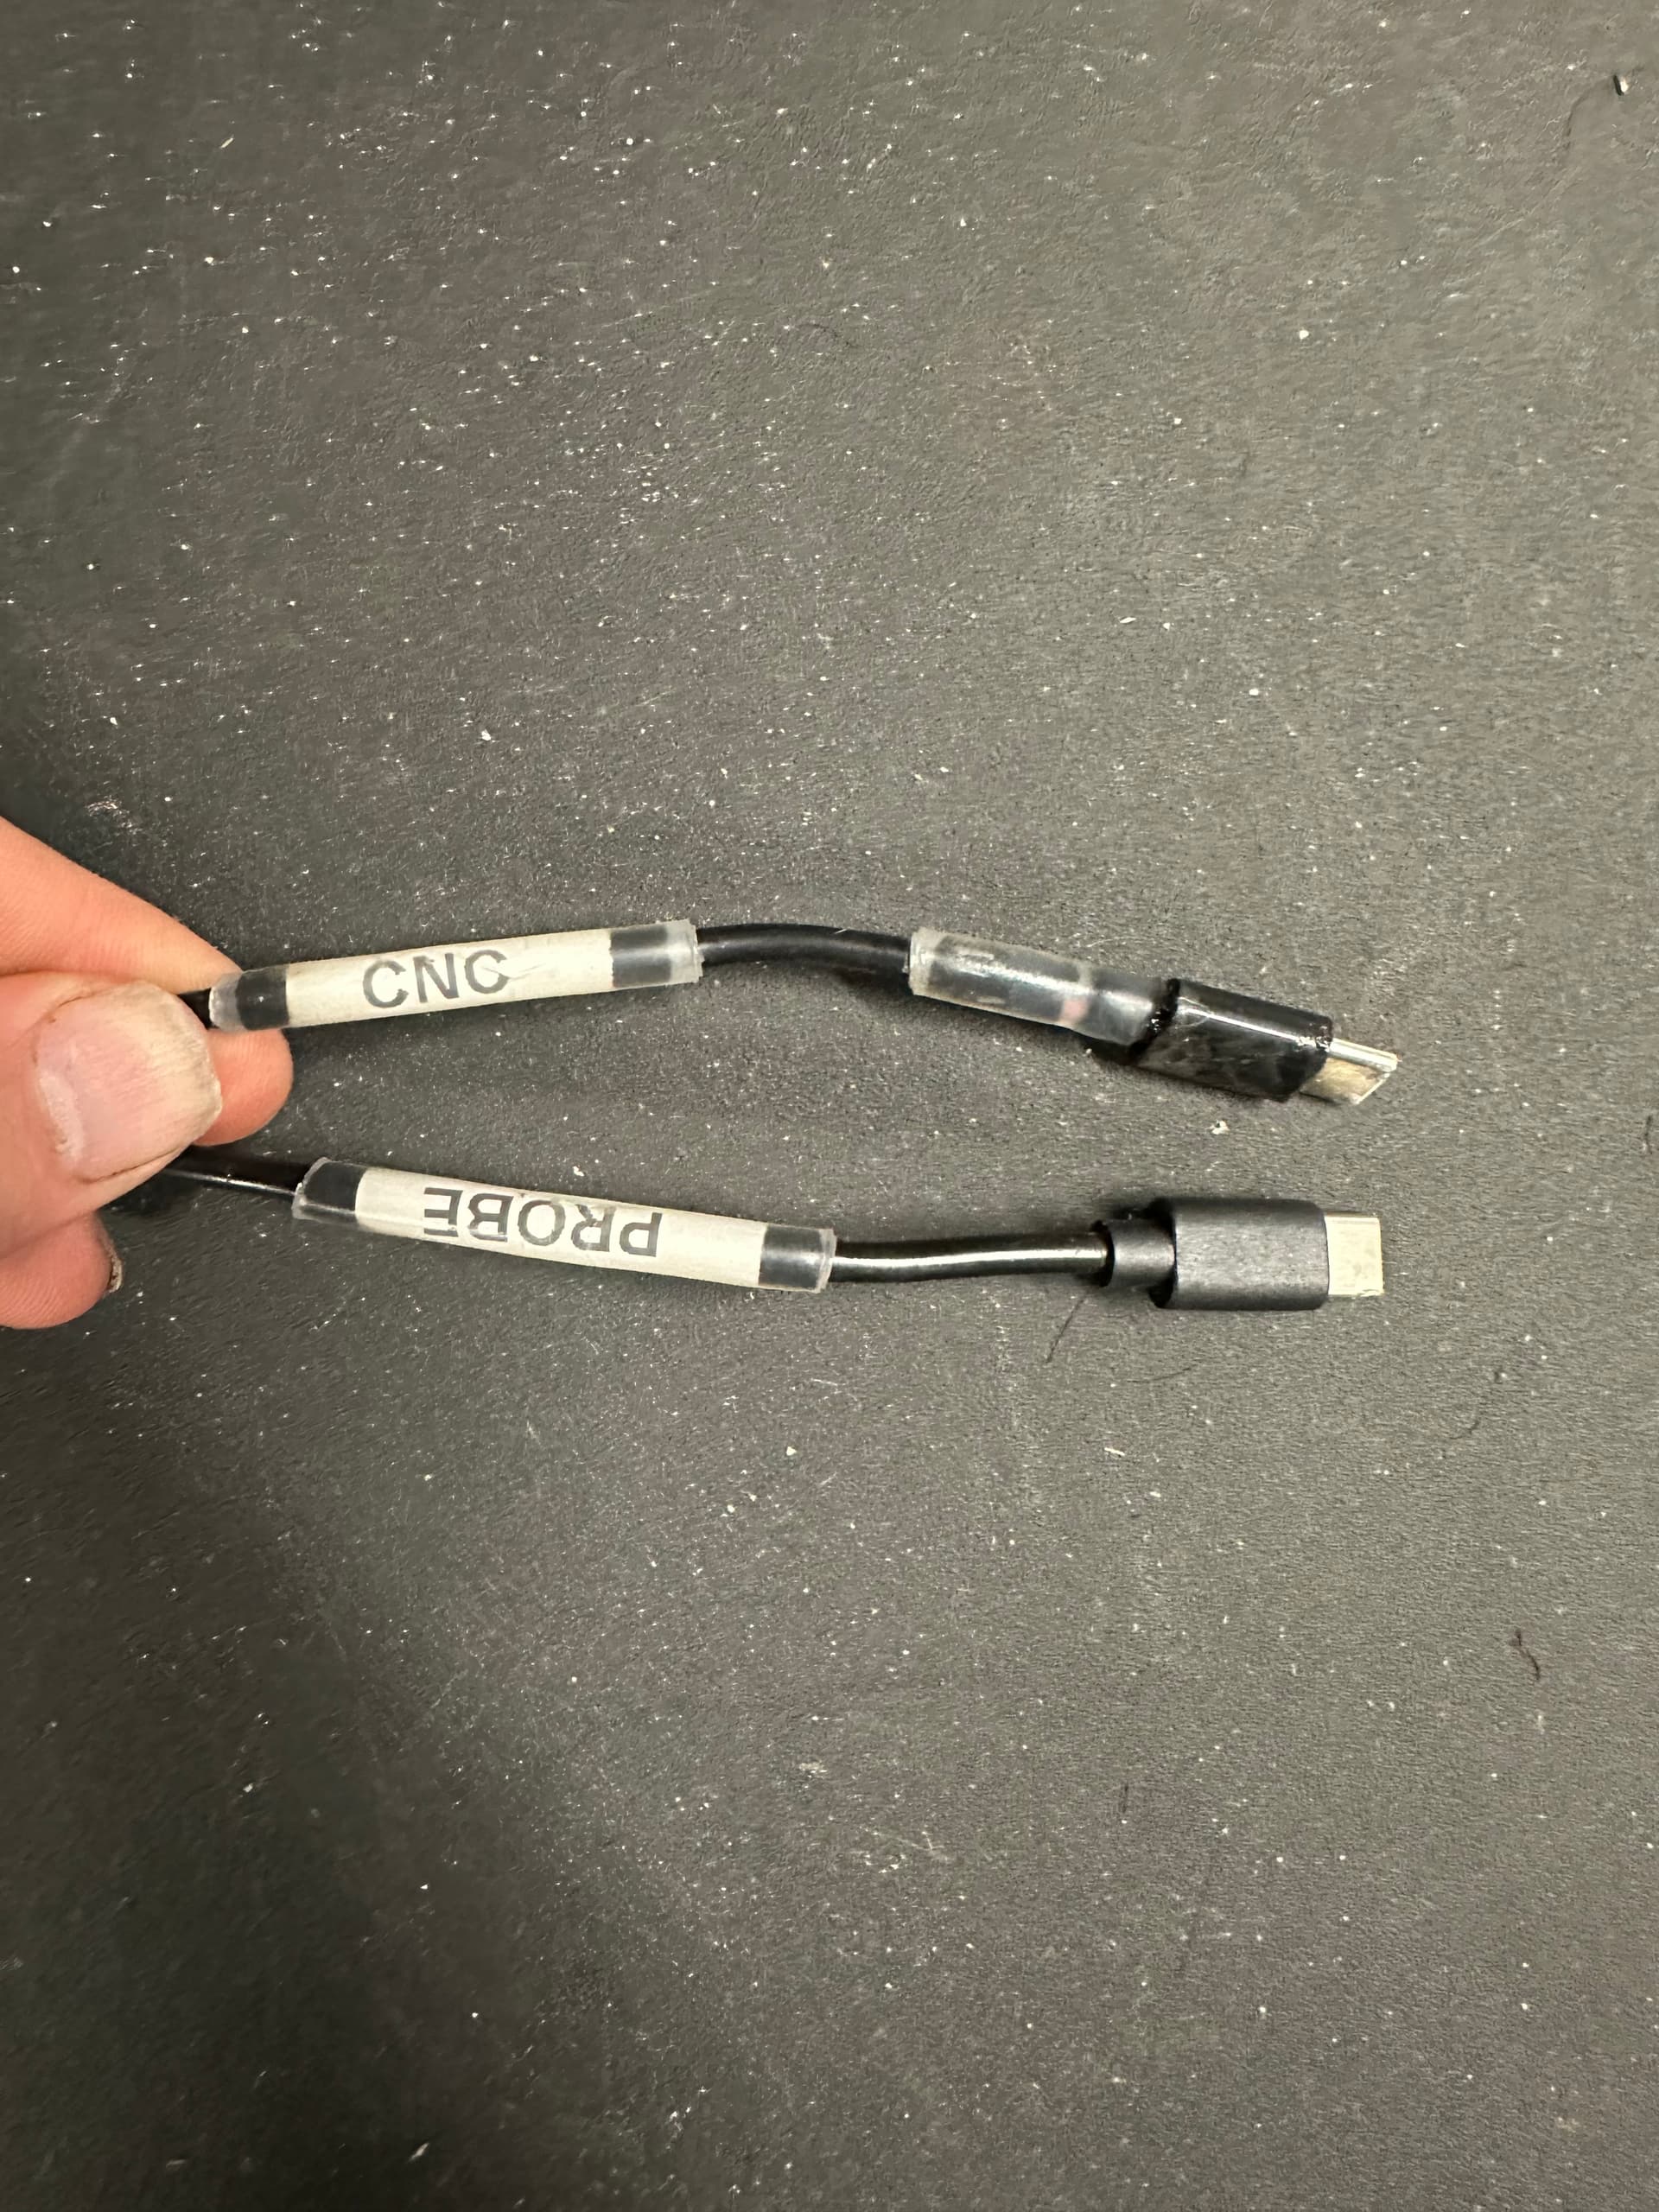
- Pull power from BBB and internalize components (provide a usb C (non-standard) to the side wall of the cover and make a usb c connector for the probe to cleanly connect to machine (5v and 3.3v!) during probing (no external powersupply needed!)
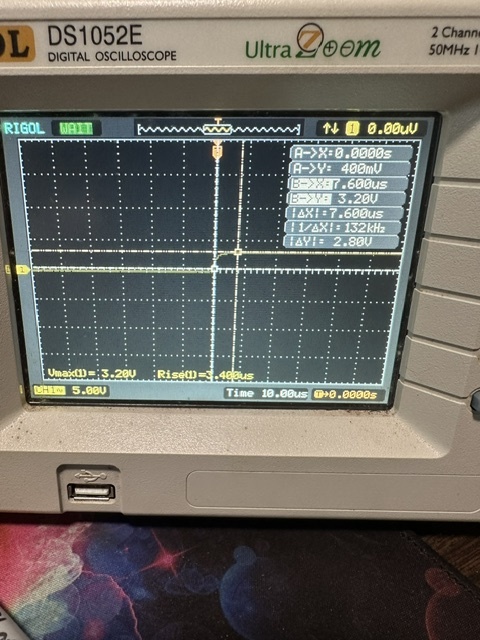
If interested this was the trigger time for probe (~7.6 us)